Understand how to generate articles within the user-interface along with the extended list of features and functions available.
How To Create Bulk Content
Step 1
Register
In order to access the application, users will first need to register for a subscription. Here is a link to get started (click here).
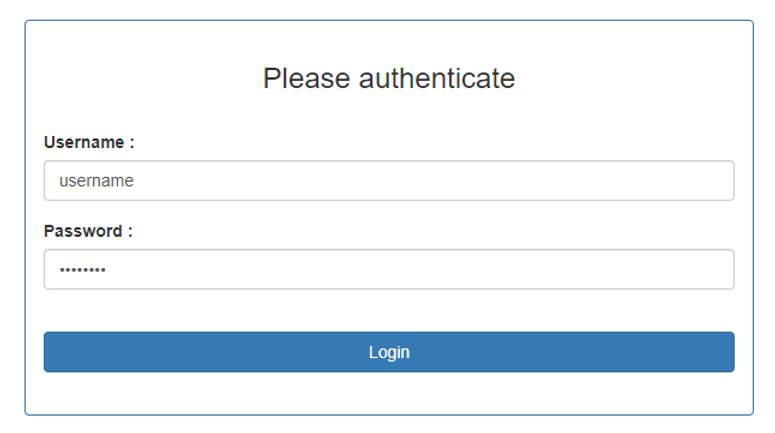
Step 2
Login
Once the registration is activated, a user will receive credentials for accessing the system. The credentials are granted within 5-10 minutes depending on system load. Here is the link to access the portal (click here).
Step 3
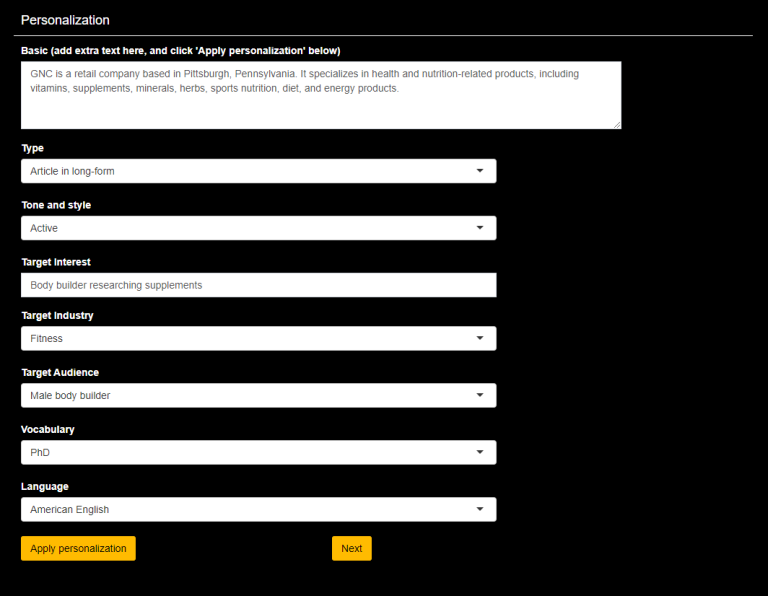
Personalization
The AI engine includes an unlimited combination of content personalization attributes. Definitions of the respective inputs are available below:
Basic: Open Text (Users can input any additional data to personalize the content)
Title: Automatically Generated
Slug: Automatically Generated
Type: Open Text (Context of use, such as "Long-Form" or "Twitter Post")
Tone and Style: Open Text (Attitude of text, such as "Active" or "Funny")
Target Interest: Open Text (Audience focus, such as "Marketer looking for SEO tool")
Target Audience: Open Text (Corporate Department, such as "Finance" or "Marketing")
Vocabulary: Open Text (Education Level, such as "5-year Old" or "PhD")
Language: Over 100 Languages available
For these changes to be applied, users are required to click on the "Apply Personalization" button.
Step 4
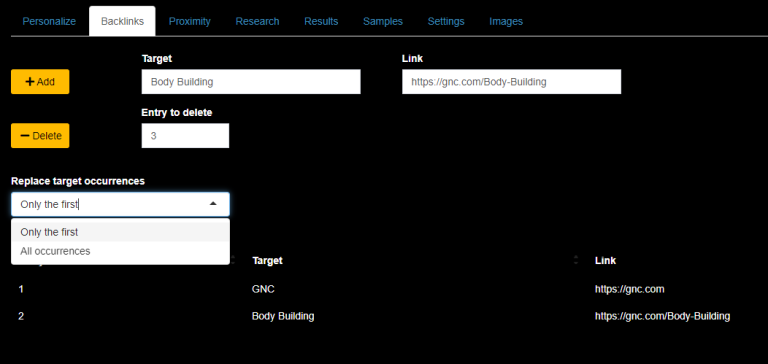
Backlinking
Apply backlings based on specific keywords in the copy.
Occurance: Users can define whether a backlink is applied in a single occurance (recommended) or every occurance. A single occurance is defined a one backlinked keywords per article.
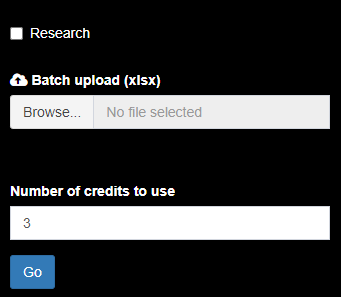
Uncheck the "Research" button to toggled the bulk upload function.
Users have the ability to upload an Excel file with multiple queries by selecting the "Browse.." button. Users can limit the rows being referenced by selecting the "Number of credits to use" input (3 is the default input, which reflects first 3 rows in the input file).
Only the first tab will be recognized, and all questions should be limited to the first column on separate rows. Queries require approximately 1.4 seconds per 600 word response.
Once the file is uploaded, select the "Go" button to begin creating responses from the AI engine. After the responses are reviewed, a user can download the file by selecting the "XLSX" or "PDF" buttons above the response prompt.
We recommend selecting the "Save HTML" button for customers wishing to import into their CMS.
*Users are assigned a fixed volume of credits based on subscription plan.
Step 6
Results
The "Results" tab will demonstrate the articles once generated. The articles can now be downloaded or synced directly to WordPress.
Select the "Save HTML" button to download the data which is available for direct import into any CMS.
Step 7
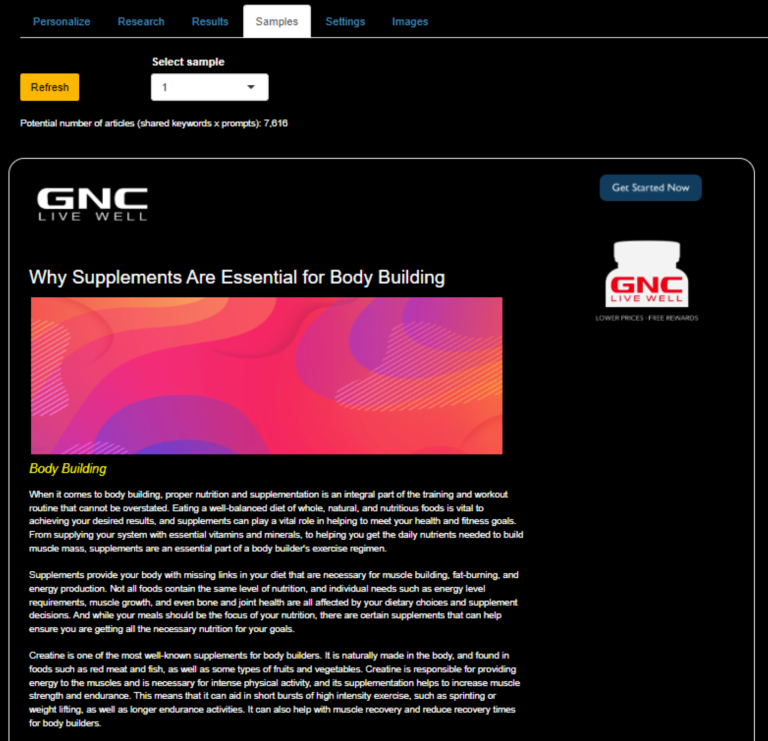
Samples (Demo)
The "Samples" tab will demonstrate the formatted articles once generated. Click on the "Select sample" to see any of the articles generated (Includes: Title, H2, Body, H3 and Images).
Note! We only provide the raw HTML, any formatting from your existing website will be automatically applied once imported into the CMS (Content Management System).
Step 8
Images
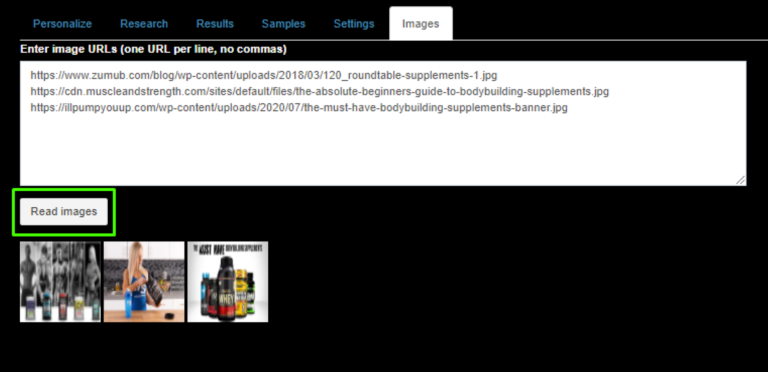
Must be applied before generating content! If the user is interested in applying images to their export file, these can be applied directly via the "Images" tab. The customer is required to host these images, and will just need to add the url of each image. Once added, click on the "Read images" button to confirm that it's loaded correctly. Now that the images have been confirmed, the "Create Content" button can be applied within the "Research" tab, this will assign the images in sequence across every article generated.
Step 9
Wrapper (Advanced)
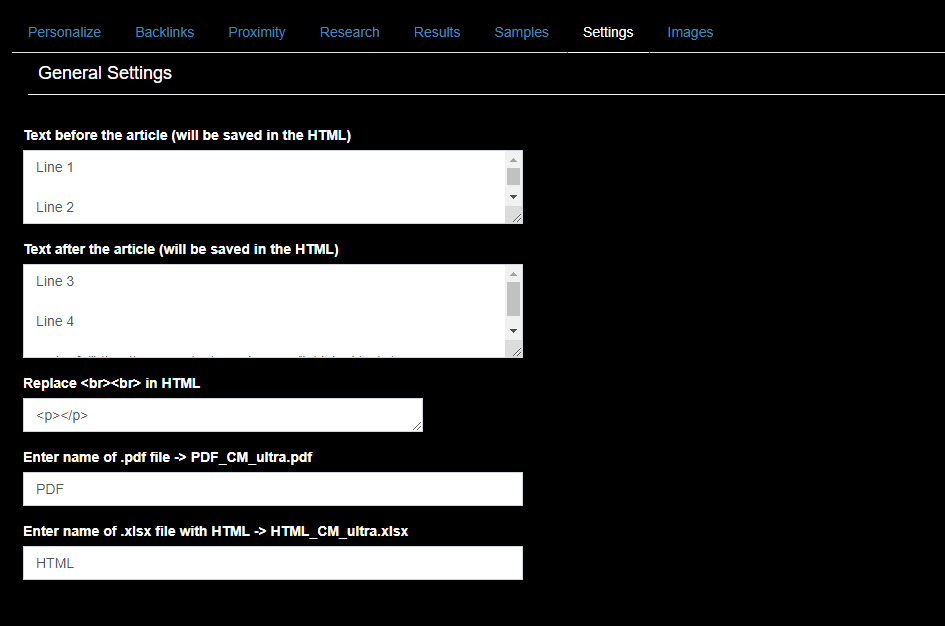
Custom HTML wrappers can be applied to the "HTML" output file. This is to be used if any additional formatting or code should be applied, an example would also be to manually code two columns, etc.
Any line break format can be applied directly from the front-end user interface via the "Replace <br><br> in the HTML" input. This will allow users to modify the code based on the website language. This modification will be applied automatically to every line break in the "HTML" output file.